Sunday, February 5, 2017
I'm Still Here and I'm Getting Crafty
Complications from my surgery and a series of unfortunate events have held me back from my Fall projection of getting back into crafting. But I'm here! And here's the latest...Enjoy!
Friday, April 1, 2016
A Little Update
So every few months I get to post a project and keep saying that I will be back soon to keep checking in...and well months pass until I post again. As some of you know, I've battled with rheumatoid arthritis for about 7 years now. When my son was 6 month old I started with a flare-up in my right right wrist. Unlike with other flares, this one was not responding to steroids. We added new medications but still wasn't working. I would feed my son with tears in my eyes and my hand shaking from the pain. I'm also an ultrasound tech and I would scan in practically the same way. Years have passed and we couldn't get this inflammation down so my rheumatologist finally referred me to a hand surgeon. He was able to get the inflammation down after several steroid injections. The problem I have now is that the chronic flare has displaced my ulna and now it rubs against my metacarpals. My wrist literally clicks as I try to write a simple note. And typing this post has increased my pain level from my standard 5 to easily a 6 pushing 7. So as you can image, craft projects have been put on the back burner. But next month I'm going in for surgery to have the ulna shortened. I will be in a cast for 6 weeks and cannot work for a total of 12 to fully recover. I'm hoping that once I am completely healed I can get back into my crafting. I miss making things and sharing those how-to's with all of you. Please bare with me and I hope that by this Fall I will ready and raring to go, pain free and full of projects to share with you. Thanks for stopping by.
Sunday, January 24, 2016
DIY Coffee Filter Wreath
HELLO! It has been FOR-EV-ER! I miss you guys! Life has once again gotten away from me and here we are almost a year since I last updated. I promise to not let so much time pass before I post again. Came up with a super easy and cute Valentine's Day decoration. Check it out below and enjoy!
Thanks for stopping by!
Wednesday, February 11, 2015
A little Love
Hey guys! It's been so long...I've missed ya! So my life got a little crazy in October with the birth of my daughter...which was to be expected. I found a little time this weekend to work on a project finally. Here's the video:
Also, if you haven't already, check out these posts for free printables to create more
Valentine's Day decor.
Thanks for stopping by!
Sunday, September 14, 2014
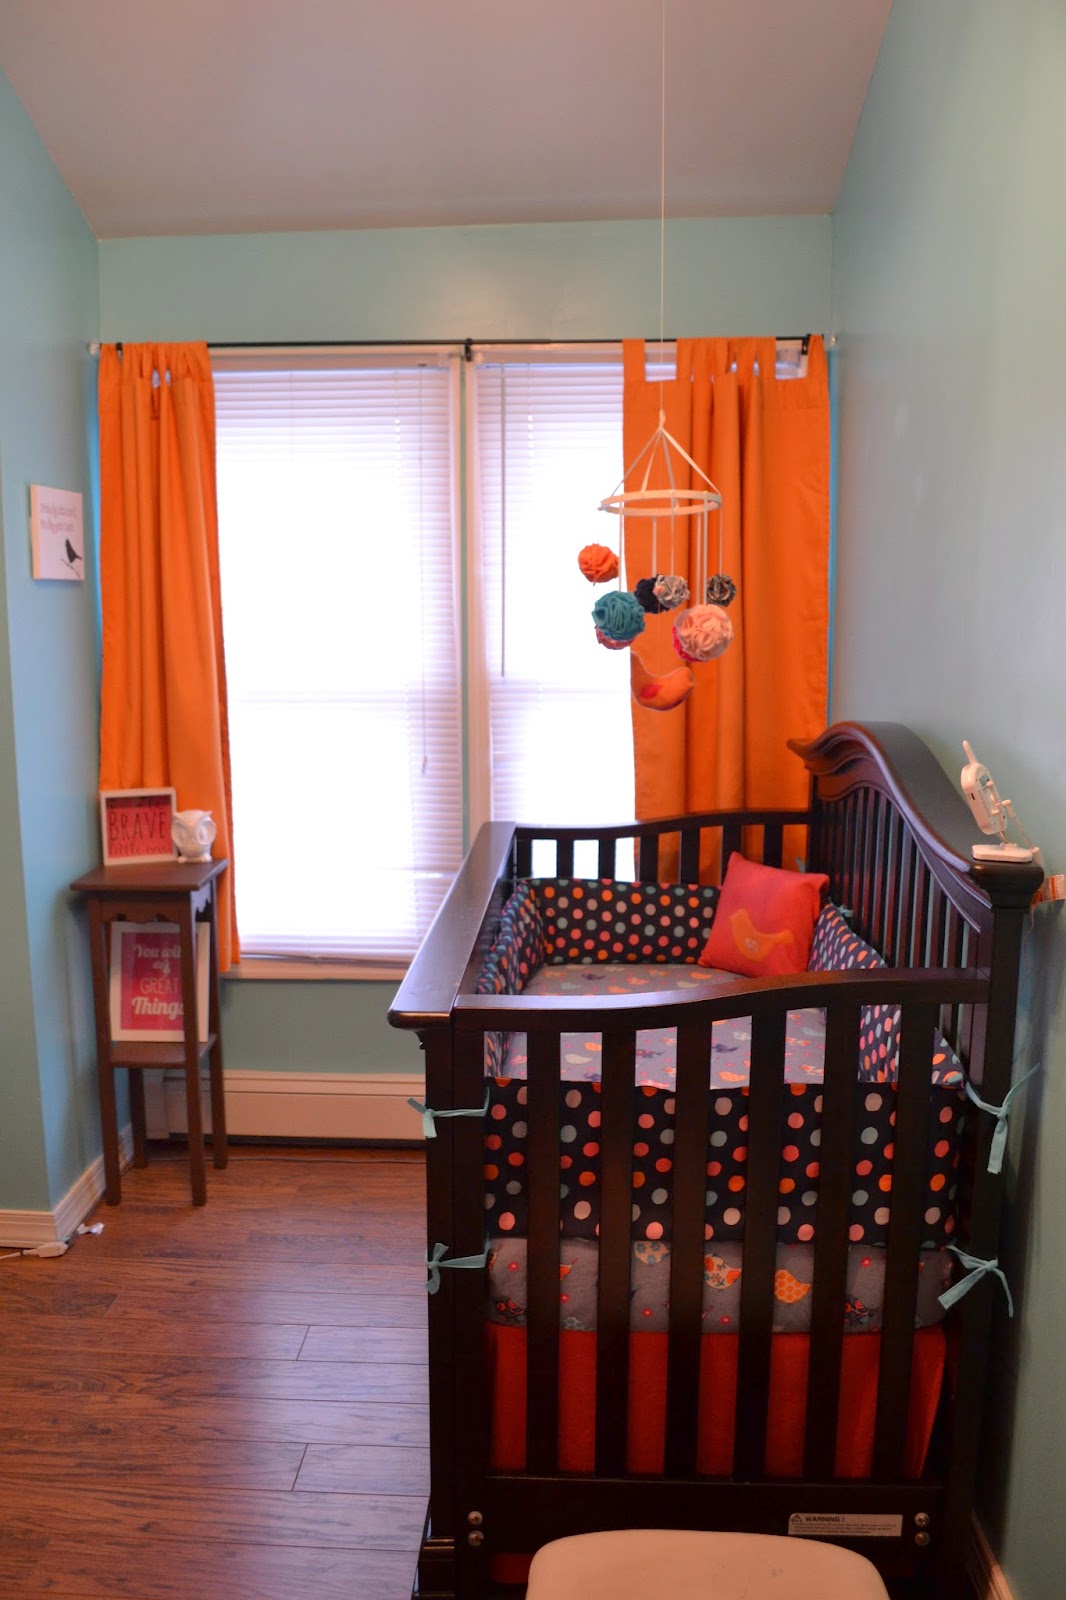
Pinspiration Sunday: DIY Mobile
Are you tired of nursery DIY tutorials? Me neither! So here's another one...DIY mobile.

My inspiration came from this picture on Pinterest from an Etsy Shop called Marigold Poms.

Here's how I made mine...
Supplies:
Embroidery hoop (I used a 12in)
ribbon/string
fabric in varying colors
corks
hot glue
pins
OPTIONAL:
spray paint (I used a cream color)
Bird (which I made)
sewing machine
matching thread
First things first you have to make your pom poms. I used different types of fabric which included cottons, fleece and felt. I cut out a bunch of circles for each fabric.

Next, instead of buying Styrofoam balls, I decided to use corks, which I have a ton of (saving them for some other project I might get around to doing someday). I cut them in half.

Here's a video to show you exactly how I assembled them.
Next, I wanted to incorporate a bird into the mobile. I used the fabric bird tutorial I found on Lavender's Blue Designs . You can click over to her page for the pattern and follow her directions from there. I also took pictures along the way to show you the process.

After you print and cut out the FREE pattern, you can trace each piece onto the fabric you plan to use. You will trace and cut out 2 bird shapes and 2 wing shapes but only 1 bottom.


Next, I used an overcasting stitch to attach one wing to each bird.


Then, with the right sides of the two birds facing each other, sew along the top of the bird from the beak to the tail .

No you want to start on the bottom. Remember, the right sides of the fabric should face each other. Pin along the edge and sew, first one side then the other.


Now that it's sewn, turn it right side out.

Now it's time to stuff it. I used the stuffing from an old toy my son no longer plays with. Once you've stuffed it, you want to sew the tail. And you should get something like this.


For the embrodiery hoop, I spray painted mine a cream color and allowed it to dry completely.

Next I used ribbon to attach the pom poms I made and enough to hang the mobile. It goes something like this

I used orange thread that was quadrupled up to attach the bird which was tied into the middle knot of the ribbon seen in the middle of the hoop. Then I used a thicker string to hang the mobile from the ceiling.

Thursday, September 4, 2014
DIY Bird Pillowcase
I really wanted to have a throw pillow somewhere in baby girl's room. But since I had custom bedding, I would need a custom pillow. Now, as I have warned you in the past I'm not a great sewer...I'm not even sure if I'm a good one...but I did come up with this:

This is how I made it...
Supplies:
Throw pillow to cover...I used a 12X12 purchased from JoAnn Fabrics
fabric to cover the pillow
2 accent fabrics for bird
buttons (I used 3)
thread
sewing machine
measuring and cutting tools
I cut two pieces of fabric, one measured 14in X 14in and the other was 14in X 17in.


I used a left over decor fabric which had a nice finished edge to it. If you don't have a finished edge create one by sewing a hem along the end of the fabrics which will be your open end. You do this by folding you fabric over once and then again, pin and sew. This creates no raw edges.


Next, I needed a bird. I pinned a great fabric bird tutorial from Lavender's Blue Design FOREVER ago and was finally going to use it. You can get the printable template at the link above. I chose to use orange fleece material I had and the wing accent was from a bird on the crib sheet bedding. I traced the template and cut out each piece, pinned them where I wanted them and sewed them in place on the front facing piece of fabric (this will be the larger of the two pieces) using a overcasting stitch.


Next, it was time to sew the two pieces of fabric together. Have the right sides of fabric facing each other and sew along the three sides that match in measurement. Leaving one end open.

Next, snip the inside corners like this

Then you can flip the pillowcase right side out and stuff in the pillow.

Not sure how one would actually handle this, but here's what I did...My front fabric, once folded to the back kind of stuck up on the top and bottom so I decided to fold the fabric in and sew it at an angle.

Next, I marked using a piece of chalk where I wanted my buttons to go...I didn't measure to make them perfect, just eye-balled it. I used my sewing machine on a button hole setting and created the holes for my buttons. Once those holes were created, I placed the fabric how it would lay once the buttons were attached, marked through the button holes where the buttons should be placed, then sewed the buttons on by hand. I got something like this:

All done! Now it can be placed in the crib (for now anyways) or on a chair or wherever you want.

I hope you guys enjoyed this tutorial. Thank you so much for stopping by and checking it out.
Sunday, August 31, 2014
Pinspiration Sunday: DIY Door Jammers

Have you seen these door jammers floating around on Pinterest? If you haven't, the idea is this...you can sneak in and out of your little one's room without having to turn the door knob and wake them. They are super cute and a crazy great idea...and once you've bought one, you realize, these would be so easy to make. Like everything else in our baby girl's nursery, I needed a custom made one to match, right?!?! ;) The best part? I already had all my supplies so it didn't cost me a thing...I love FREE!
So here's how I made mine.
Supplies:
2 hair ties (those really thick ones)
fabric
cushiony (if that's a word) fabric like felt or fleece (I used fleece)
measuring and cutting tools
thread
sewing machine
iron

I had some fabric leftover from my crib bumper makeover so I used that. You want to cut your pieces into rectangles. My section of leftover fabric was 6 inches wide, so I cut my pieces 6" X 4" to get started.


Next, you want to fold your fabric edges over and iron them down. This will give you a nice smooth edge for your finished project. I didn't measure mine, just did one piece all the way around and then matched the second piece by laying it on top to see where my creases need to be made.


Next I cut my corners down so there wasn't so much fabric there.

Then, I cut a piece of fleece slightly smaller than my two fabric rectangles.

And put it inside the folded over edges of one of the fabric rectangles.

Next, I put the hair ties in place on each end of the rectangle.

After that, I placed the second fabric rectangle on top, lining up the edges and pinning them together.

Now, you're ready to sew. As seen in the other images of door jammers, I sewed along the outside edge then moved in about a quarter inch or so and sewed all the way around again. This is how it turned out.

Here's the door jammer on the door, ready to go.


Hope you liked this tutorial! Thanks for stopping by!
Subscribe to:
Posts (Atom)